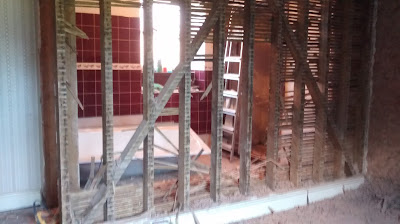
We are still amazed that a house this size never really had a main bathroom. The one that did exist was an uncomfortable layout of toilet in its own closet and a bath and basin in a separate but adjoining room down a small corridor. As we looked at how best to locate one, the only logical place (due to waste and drainage options) is where this two room bathroom configuration was. To make it work better though, we decided to knock through into the bedroom next door. One of the main reasons for this was the fireplace:
It was completely hidden when we came to view the place but a nice surprise as we went round finding what was here. It seemed such a shame to leave it in a bedroom on its own, so having the opportunity to make it a feature of the main house made total sense. We knew that by knocking through it would make this room HUGE! But, it felt like a house this size could take it, so off we went at knocking through the old partition wall....
Taking down lath makes a right old mess (but does provide plenty of future firewood):
Once cleared out, it gives a real sense of how the room would fit together:
So then we got on to re-configuring the ceiling...
Another messy job but once free of debris, Mike got on to constructing the new joists:
A view from above as I hammered in the nails on the joist hangers:
The old water tank that was up in the loft - we had considered taking it down, but after draining it and trying to lift it (impossible) we just decided to leave it in place...
Once the joists were in place it was up with the plasterboard:
And as Mike kept hitting his head on the old door frame, we opened that up to put in a taller one:
Underneath the old opening was a even older door frame. It must have been in place when this bit of the house was a barn. Not wanting to get rid of it, we relocated it to the opening of the old airing cupboard, so that it could act as a frame for some new (reclaimed ceiling joist) shelving:
Once the walls and ceiling were covered with plasterboard, we got the plasters in to coat the room:
A few weeks drying time gave us a chance to choose some colours. And as we loved the tiles of the old fireplace, we decided to theme the room around this. So blue and orange were the order of the day, with Chinoise on the walls:
And a Wapping Orange tile for the shower wall:
Mike rightly looked impressed when the tiling was all done:
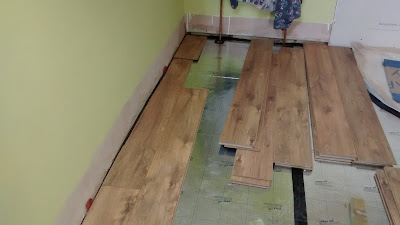
And next we got onto sanding the floor...
With a very reasonable hire from a local company, we had a
floorsander and edger for 24hrs. It made good work of taking back the old lacquer:
and was really good fun to use! The end result was really impressive:
And as we had to replace some of the floorboards with new, we added some wood dye and varnish to help blend them in:
After a few coats they were starting to blend:
And after a final sand and coat of oil - you couldn't really tell the difference:
The room was really starting to come together, with the plumbers coming in to fit the bath, sink and toilet and shower unit:
The last piece of furniture for the room was a towel rail. We'd been having a real game trying to find one big enough, and made appropriately for the heating circuit we were connecting it to. So, Mike said he'd like to make his own!
Very impressed by his bravery, he had a lesson from Richard on how best to solder the joints:
The finished article looked really impressive and once tested for pressure it was up there at 6 bar!
- well done Mike!
It's going to look lovely in place and really tie the whole room together:
So, as a final treat for getting the first room in the house complete (after a year)
we spied an interesting old cabinet in a local junk shop and thought it would fit just perfect in this new space, so we bought it:
Can you guess what it used to be?
All that needs to happen now in this room is to hang the door and at some point put some shelves up, but everything in here is good to go! It's really exciting to finally tick a room off!! And once we get around to testing the water, we might just be able to have that long awaited bath - ahhhh, bliss!


